Wednesday, October 31, 2012

Secondary Pumpkin Patches

Happy Halloween all! Here is an example of the pumpkin patch pictures that I made with kindergarten. 


I wanted to review color mixing with my kinders and do something fall related. I thought it would be nice to make pumpkins at night. I gave each table a tray prefilled with two primary colors and gave them a chance to swirl and mix. I love how excited they always get when they make a new color. We mixed and painted the pumpkins first. I took up the orange trays and gave them new trays to mix up green, and then let them mix purple for the night sky. During the next class meeting they drew in lines with black crayon. Then I gave them brown, green and yellow paper to glue in shapes for the stems, leaves, and stars. The paper was pre-painted and came from my scrap bins. They gave a really nice texture to the paintings.


Please take a moment to subscribe, like me on facebook, or follow along on google+

Monday, October 29, 2012

Happy Birthday Bob Ross!


He would be 70 today. I use to love watching him on PBS when I was younger thinking how neat it was that there was a painter on tv. I really love the attitude that he had towards art and creating. "Everyday's a good day when you paint."


Thursday, October 25, 2012

Color Bugs!!!

I wanted to think of a unique way to introduce color mixing to my first graders and came up with this idea. First we read the story Mouse Paint and discussed primary and secondary colors. The students mixed their colors, drew their backgrounds, and collaged their bugs to complete their beautiful pictures. 


Please take a moment to subscribe, like me on facebook, or follow along on google+

Saturday, October 20, 2012

Painted Paper Everywhere: My Solution

A few days ago I read a post on In Art Class about having tons of scrap paper and what to do with it. I thought would post my solution to having tons of scrap paper that I can't bring myself to throw out.


Stackable laundry baskets! They are a life and space saver. I bought them from walmart for about $4-$5 each. Now that's a large amount to drop at once, but I foresee these baskets lasting until I retire. Also, they can easily be slid out of the way as one.


I have a black, blue, green, purple, orange/brown, yellow, red, and multicolored/painted paper baskets. As you can see, the painted paper basket gets really full. This is where all the scrap paper goes from my Eric Carle Animal lesson. This paper does get reused in other projects a lot.


Sometimes, after a project,  I have to cut down the scraps into usable pieces and recycle the itty bitty pieces. This system keeps my room clean and organized. Just like I like it!

Monday, October 15, 2012

Color Wheel: Hand Line Design


Color is my favorite element of art! I was trying to think of a way to teach color theory without having to do the same old color wheel, while at the same time covering more elements and principles. I enjoy hand art and came up with this crayon resist hand line design. The students traced their hand three times with only one finger touching another finger on a second hand. Done right, you will end up with six different sections. From there we talked about line, shape, pattern, and variety/visual interest. I instructed them to fill in each section with a different pattern using lines and shapes while showing variety. They all started with pencil so that I could observe and make sure they were all on the right path. 


Next, I showed them how water resists wax and had them trace over all of their pencil lines with black crayon. Lastly, they watercolored in each area in color wheel order. Some got the concept, and others I think got distracted and got out of order. They came out really nice!


Thursday, October 4, 2012

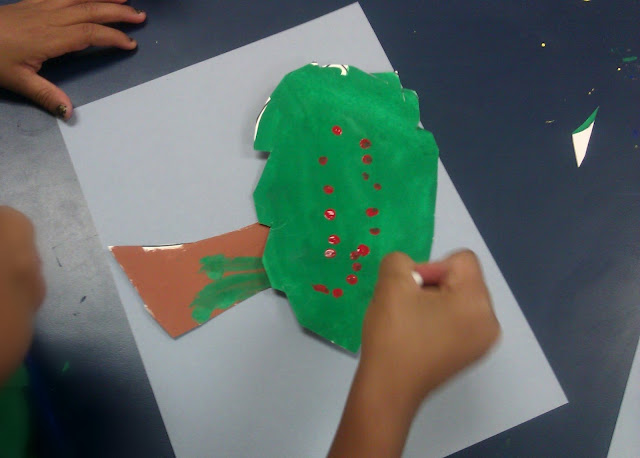
Painting with Pre-K: A is for Apple

One of the first projects I did with Pre-K was the Brown Bear assemblage. I really wanted to focus on painting, cutting, and gluing. They came out so nicely that I wanted to continue on the same path. I know that the little ones are working on letters and numbers, so I wanted to base my projects around the alphabet. I didn't think about this until after Brown Bear and decided that this project would be about the letter A.


I showed the students a book about Apples. I talked to them about the seasons and how apples grow. Next, I gave them a piece of paper with the leaves and tree trunk already drawn on it. Last time they only painted with one color. This time they got two. I instructed them to paint the leaves green and the trunk brown. They did so well at painting.


The second class time we focused on cutting more intensely. To start, I gave each student a piece of paper with three black lines on it: strait, curvy, and zig zag. I have a lot of scrap paper around and used it for this activity. The got scissors and were instructed to cut on the black line. Just like with any group of students, some did better than others, but practice makes better!


Next, they cut out the two separate pieces and used small dots to glue them onto light blue paper. Lastly, I gave each student a q-tip and showed them how to add apples to their tree with red paint. They loved this part and got very excited about adding their apples.


Note: be careful how long you let them do this step. They really do love adding apples to their trees, and if your not watchful the pictures can turn into an applepalooza.

If you are enjoying this blog, please join or like on Facebook!!! Thanks!