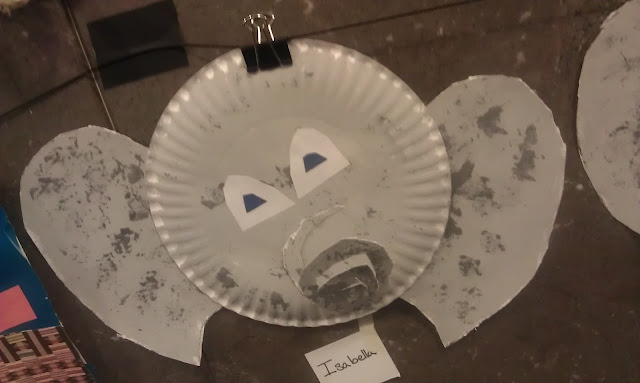
This is a lesson I do with my kindergartners. The lesson works on tracing, cutting, shapes, painting in the lines, texture, new painting techniques, and symmetrical shapes. It's a lot, I know, but the lesson has worked so well.
First we talk about texture. We define it and find examples. I ask my students what the texture of an elephant is. Common responses are dry, rough, and wrinkly. I inform them that we're making an elephant face from a paper plate, paint, and different shapes. I pass out large white paper, a template for ears, and a circle for the nose. I love their faces when I tell them that the trunk will be made from the circle. You can see them trying to process and figure out how. They trace the ears and circle in black crayon and paint all of the pieces a light gray including the plate.
Next, each student gets a pre-cut square of plastic grocery bag. I show them how to "crumple" the plastic, paint dark gray onto it, and add texture to the elephant. Again, all shapes get textured paint. I really like that I'm able to find a reason to reuse the plastic bags.
The next time we meet, they cut out all of their shapes and attach the ears to the back of the plate. I've learned to use glue and masking tape. I've found that glue and tempera don't always seem to work together that well, so the tape adds extra reinforcement. I show them how to cut their circle into a spiral and attach it for the trunk. They love this part and think it's so cool. What's great is that I will see spirals turning up in other art projects without prompt.
Lastly I teach them how they can get the exact same shape from one piece of paper if they fold and then cut out their shape. They do this step for their eyes. What's great about this step is later on I'll see them realize that they can fold the paper more than one time and get more than two shapes. I love seeing the students problem solve!!
Here are some student examples.
I really like the shape of the eyes on the last one!


Those elephants are so cool!
ReplyDelete